Running Toilet in an Apartment: What You Can Check Safely
Use this when your toilet keeps making water sounds after flushing or cycles on and off. This guide covers simple tank checks only, not replacing valves, supply lines, wax rings, or floor plumbing.
By Portia Me'uan Thomas. Updated June 11, 2026. Edited for renter-aware safety.
Time: 10-20 minutes. Difficulty: Easy. Safety: Low unless water is leaking.
Quick Answer
Remove the tank lid carefully, check whether the flapper is sealing, untangle the lift chain, and make sure the float moves freely. If the fill valve will not shut off or any part looks damaged, contact maintenance.
Editorial and Safety Note
In this guide, I keep the work inside dry, visible, reversible checks, clear documentation, and early escalation when a problem touches safety systems, building systems, or uncertainty.
My Field Note
When I work through this guide, I slow the problem down into what I can see, what I can safely test, and what I should not touch. That keeps the article useful without pretending every home problem is a DIY project.
What I Would Measure
The measurement may be a time, photo, sound, movement, odor, temperature, water level, or before-and-after note. I only use measurements that a beginner can collect without hidden access or risky tools.
Where I Would Stop
I stop when the task stops being dry, visible, reversible, lease-clear, or easy to explain in one plain sentence.
What I Would Save for Later
- One wide photo
- One close-up
- Date, room, and symptom
- What changed after the safe check and what was not touched
Safe Ways to Try
For this kind of visible hardware, I would give a beginner more than one safe path only while the work stays visible, hand-powered, and reversible.
Method 1: observe and mark the movement
Best when the part wiggles but still works.
- Take a close photo before touching the screws or alignment.
- Move the part slowly once and notice whether the movement is side-to-side, up-and-down, or coming from one screw.
- Stop here if the part affects entry security, a door latch, a cracked frame, porcelain, or anything load-bearing.
I like this first because it tells me whether I am tightening a loose user-facing part or accidentally chasing a bigger alignment problem.
Avoid: Do not start by tightening every screw you can see; that can hide which part was actually loose.
Stop line: Call maintenance if the flapper is warped, the fill valve keeps running, water reaches the overflow tube, the shutoff valve leaks, the toilet overflows, or water appears around the base.
Method 2: quarter-turn tightening
Best when a visible screw is loose and the surrounding material is solid.
- Use the correct screwdriver size so the tip fills the screw head.
- Tighten a quarter-turn at a time, alternating screws when there is more than one.
- Test the part after each small adjustment instead of trying to make it as tight as possible.
The moment a screw spins without catching, I stop. More torque usually makes the repair worse, not better.
Avoid: Do not drill, glue, force stripped screws, or change rental hardware without approval.
Stop line: Stop if the screw strips, the material cracks, the part still wobbles, or the problem affects a lock, latch, frame, wall anchor, or porcelain.
Method 3: normal-use test
Best after the part feels better but before you call it finished.
- Use the handle, hinge, drawer, shelf, or seat the way you normally would.
- Listen for scraping, clicking, shifting, or new resistance.
- Take an after photo if this was a rental issue you might need to explain later.
I do not call a small hardware fix done until it survives a gentle normal-use test without needing force.
Avoid: Do not keep adjusting if every test changes the problem in a new direction.
Stop line: Stop if the part loosens again right away, no longer lines up, or needs body weight or force to work.
If those do not work
- If the gentle tightening path fails, send maintenance the before photo, after photo, and one sentence: what moves, where it is, and whether the item still works.
- If the item affects entry security, heavy furniture, a toilet, or a door that can trap someone, skip more DIY and escalate.
Failure Case
Failure case: skipping the stop line
Skipped step: Skipping documentation and trying one more DIY step after uncertainty appears.
What can go wrong: A small visible issue can cross into a building system, safety system, lease-controlled fixture, or professional repair. That usually makes the problem harder to explain and more expensive to undo.
Safer recovery
- Stop the task and take a wide photo plus a close-up.
- Write the simplest accurate description of what changed.
- Use maintenance, landlord, emergency services, or a licensed professional when the stop line appears.
Before You Start
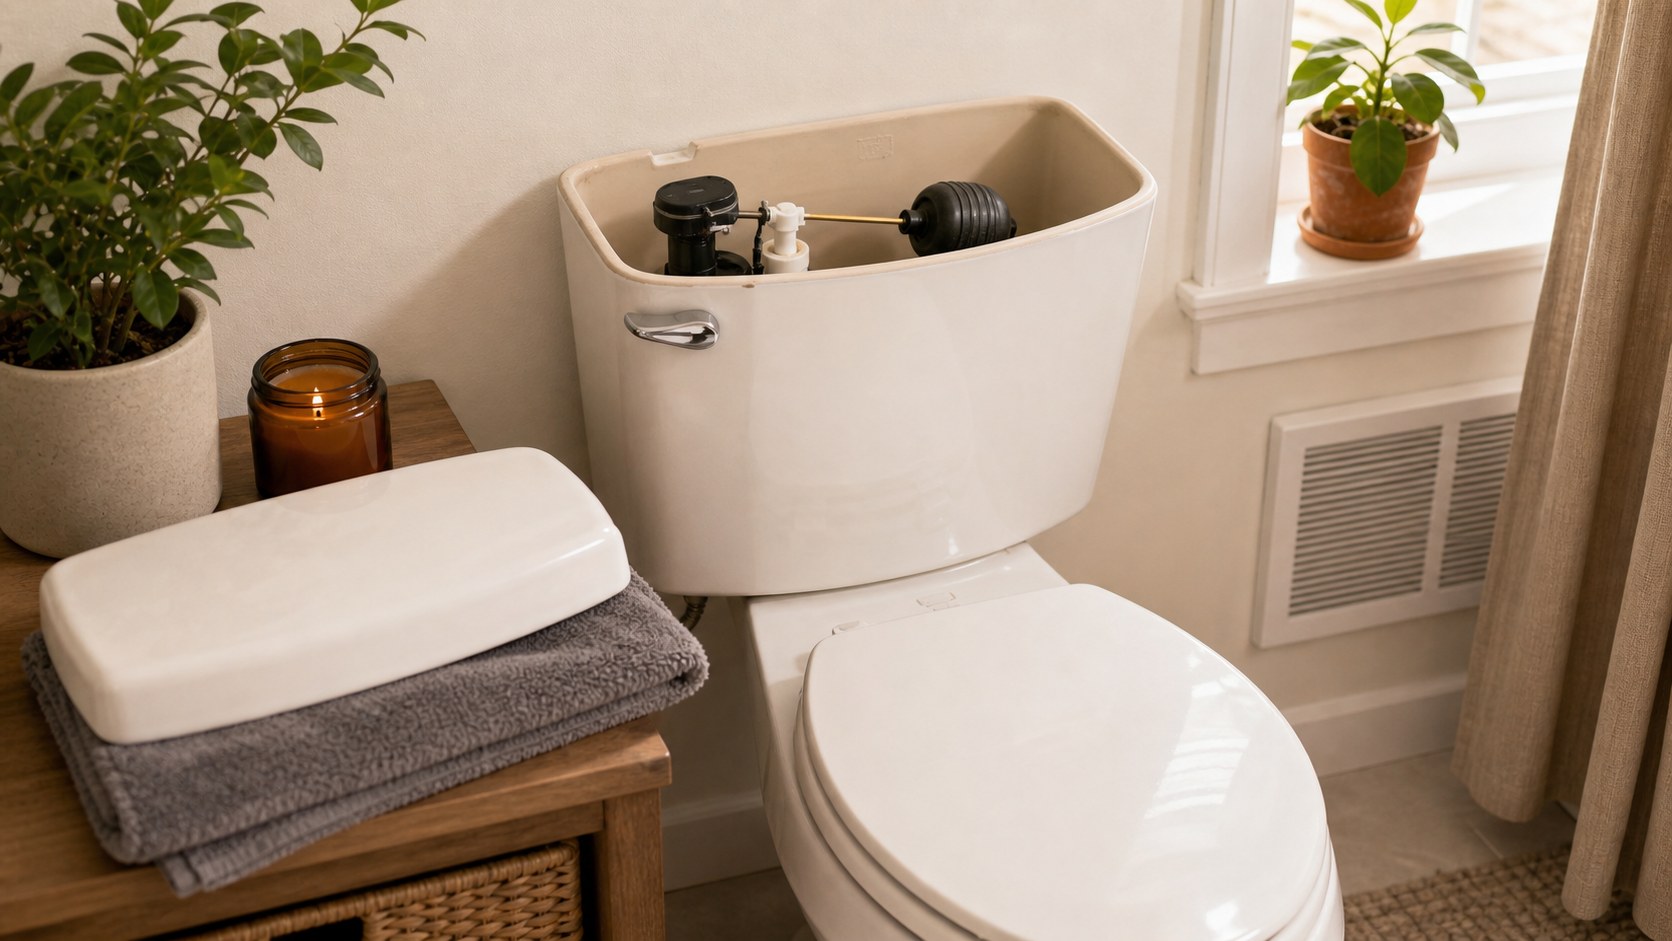
- Place the tank lid flat on a towel; lids crack easily.
- Do not force the wall shutoff valve if it is stiff or corroded.
- Look for water around the base before touching anything.
Tools Needed
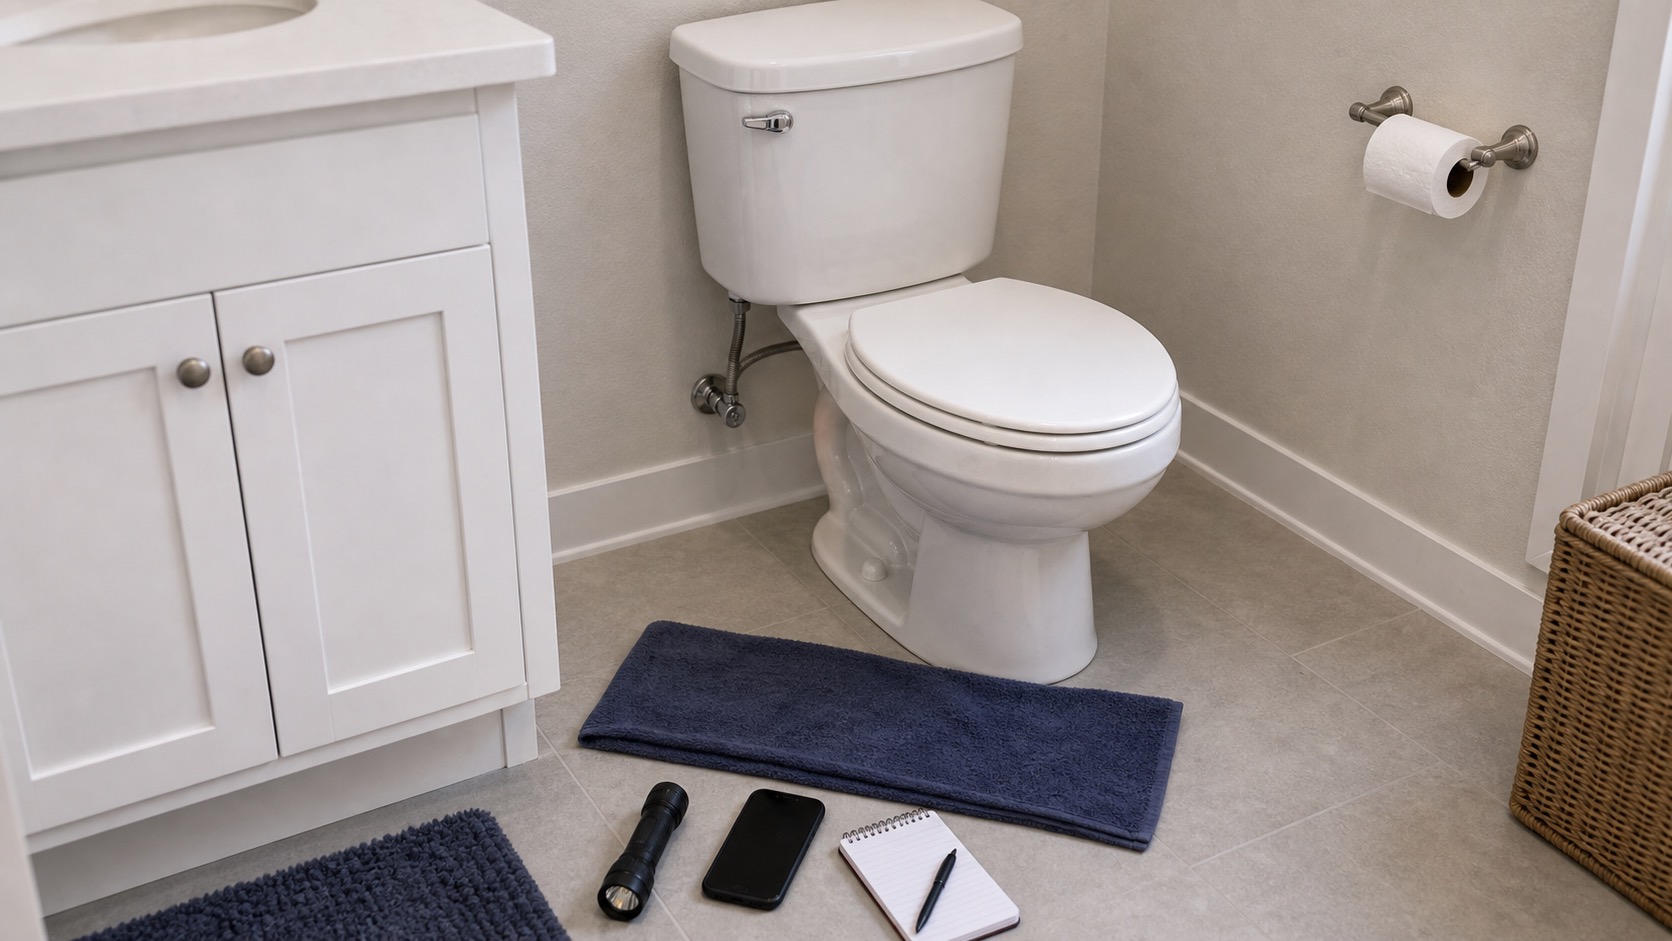
- Towel for tank lid
- Gloves
- Flashlight
- Phone camera for documenting parts
Renter Notes
In apartments, internal tank adjustments are often fine, but replacing toilet parts may be maintenance responsibility. Report water on the floor, a stuck shutoff valve, or repeated running.
Step-by-Step Guide
- Lift the tank lid with two hands and set it safely on a towel.
What I check before the next step: Before continuing, I confirm the step stayed dry, visible, reversible, and within the lease or my comfort level. - Flush once and watch whether the flapper drops flat over the drain opening.
What I check before the next step: I look for spreading water, wet electrical areas, sewage odor, swelling, or moisture below the fixture. Any of those turns this into a stop-and-report issue. - If the chain is caught under the flapper, untangle it and leave a little slack.
What I check before the next step: Before continuing, I confirm the step stayed dry, visible, reversible, and within the lease or my comfort level.
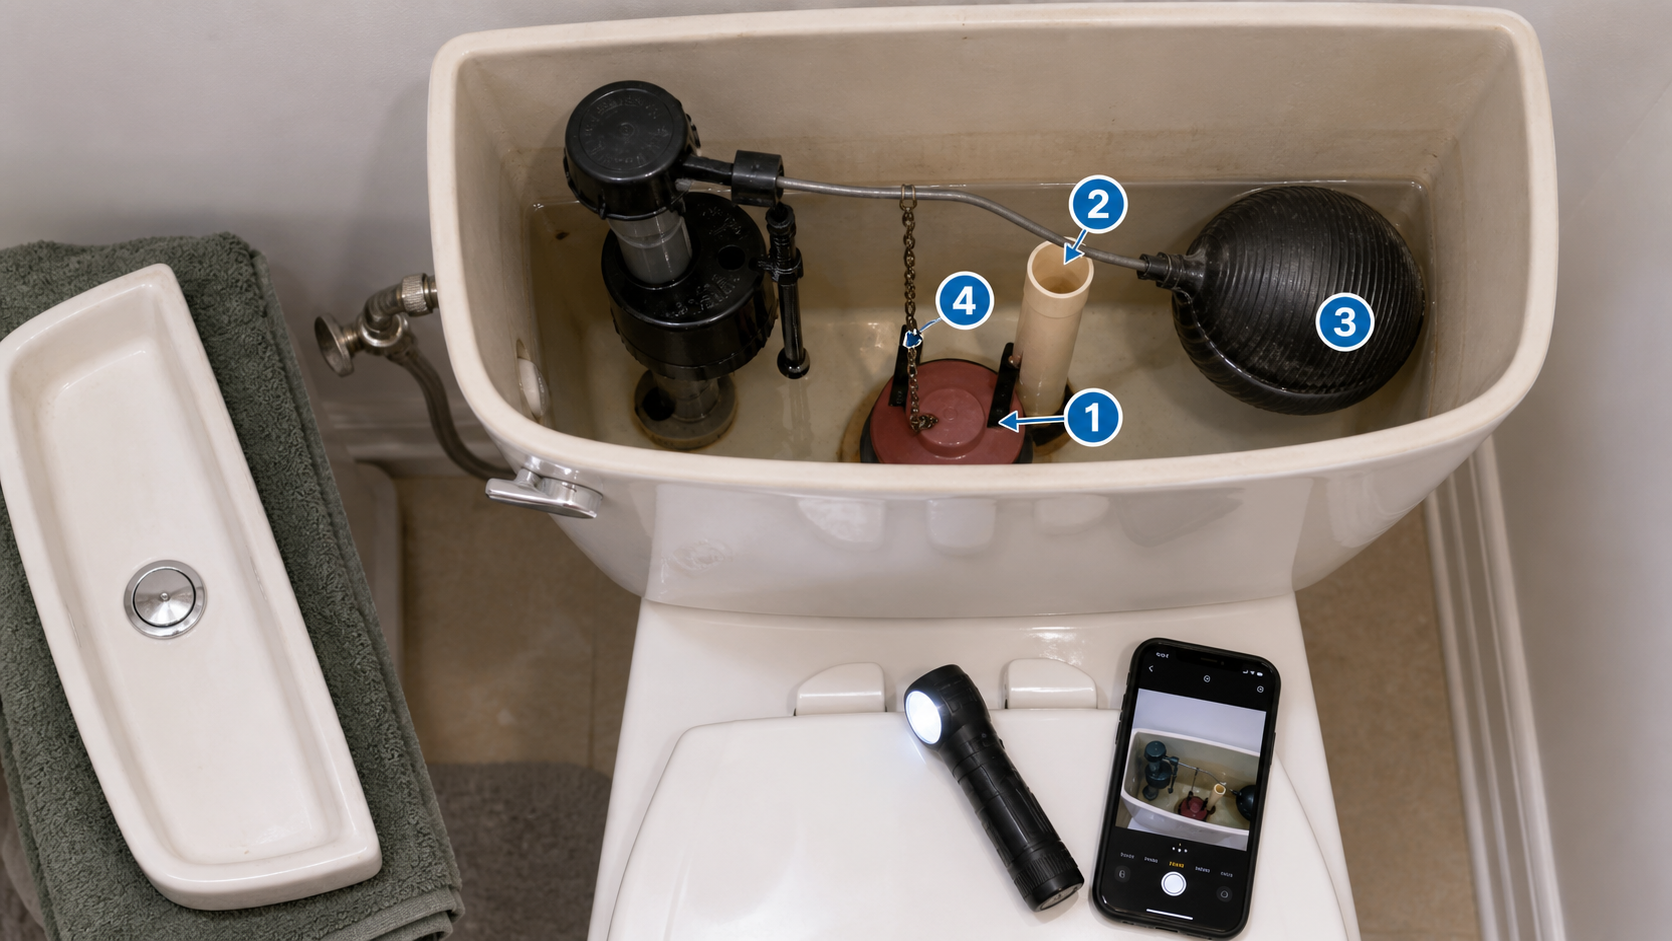
- Gently lift and release the float to see whether water stops filling.
What I check before the next step: I look for spreading water, wet electrical areas, sewage odor, swelling, or moisture below the fixture. Any of those turns this into a stop-and-report issue. - Make sure the refill tube points into the overflow tube and has not fallen out.
What I check before the next step: Before continuing, I confirm the step stayed dry, visible, reversible, and within the lease or my comfort level. - Put the lid back and listen for several minutes to confirm the running stopped.
What I check before the next step: I treat the result as information. If the problem improves, I verify once; if it stays the same or worsens, I do not keep repeating the step with more force.
Safe Next Steps
- If the result improved, do one normal-use test and finish with the checklist item: Tank lid placed safely.
- If the result is mixed, stop after the listed low-risk checks and decide whether the issue belongs with maintenance, your landlord, or a licensed professional.
- If the result did not improve or got worse, do not add force, stronger chemicals, hidden disassembly, or a new tool. Call maintenance if any stop sign appears.
- For a rental, send a short maintenance message with where the issue is, when you noticed it, what changed, what safe check you tried, and two photos. Keep the confirmation.
Common Mistakes
- Dropping or leaning the tank lid where it can slide.
- Bending float parts aggressively.
- Ignoring water around the base because the tank issue seems fixed.
Practical Renter Details
Tank-only troubleshooting record
- Set the tank lid flat on a towel before looking inside; cracked lids can be expensive and hard to replace.
- Watch one flush cycle without moving parts first so you know whether the chain, flapper, float, or refill tube is involved.
- If water is near the base, supply line, wall valve, or floor, treat it as a leak report rather than a running-toilet fix.
- Replacing tank parts may be maintenance responsibility in many rentals, even when the part is inexpensive.
What to Document
- Whether water reaches the overflow tube
- Chain slack or flapper condition
- Any water on the floor
- Whether the wall valve looks corroded or stiff
Short Maintenance Message
Hi, the toilet in [bathroom/location] keeps running. I checked the tank visually, set the lid safely aside, and did not replace parts. It appears related to [chain/flapper/float/unknown]. Photos attached.
What Not to Touch
- Forcing the shutoff valve
- Replacing supply lines or fill valves
- Dropping the tank lid
Stop Point
Stop if there is floor water, a stuck shutoff valve, damaged tank parts, repeated running after a simple check, or any overflow risk.
Checks, Measurements & Stop Lines
Toilet tank observation
running toilet is treated here as a beginner observation and control problem first, not a chance to prove you can take apart the home. The safe version is visible, reversible, and easy to stop.
For renters, the important line is ownership. You can usually observe, photograph, time, clean lightly, or tighten a visible non-security part, but hidden systems, building-owned fixtures, and lease-controlled hardware belong to maintenance.
Benefits
- The reader gets a calm order of operations before panic or embarrassment takes over.
- Measurements make the problem easier to explain to maintenance and easier to compare after each step.
- The guide creates useful evidence without pretending the reader has professional repair responsibility.
Risks
- The visible symptom may be connected to plumbing, electricity, locks, HVAC, or appliance systems that are not beginner-safe.
- A forceful tool, chemical, ladder, or repeated reset can make the original problem worse.
- Rental work done without permission can become a deposit, lease, safety, or insurance issue.
What to Watch For
For this toilet tank observation guide, I start by separating what can be observed from what would alter the home. Observation means photos, timing, notes, light cleaning, or checking a visible user-facing part. Alteration means opening a system, forcing a connection, drilling, cutting, bypassing, or hiding the symptom.
The renter-safe part is narrow on purpose: Set lid safely aside.; Watch one flush cycle.; Untangle a caught chain gently.. If the real situation does not fit that list, the article should help the reader document and report instead of pushing them into a repair.
The measurement section matters because vague complaints are hard to act on. A drain time, drip rate, indoor temperature, latch test, alarm result, screw movement, or usefulness score gives maintenance a clearer starting point without inventing professional-level certainty.
The field test should stay inside this boundary: Use one flush observation and one five-minute listen test. Do not keep flushing if the bowl or tank behaves abnormally. If a test needs force, chemicals, panels, height, hidden parts, or repeated resets, I would stop the test and turn it into a maintenance message.
The most important stop signs here are: Stop for floor water.; Stop if the shutoff valve resists.; Stop if parts are warped or broken.; Stop if water reaches overflow.. Once one appears, the next useful action is documentation, landlord or maintenance contact, emergency escalation, or a licensed professional through the proper channel.
The final check is simple: did the condition improve, stay the same, or cross a stop line? I would keep one clear note or photo of that end state so the next action is obvious: keep monitoring, send a maintenance message, or escalate immediately.
Real-World Scenario
The toilet refills long after flushing or turns on every few minutes. The safe beginner check is to watch one flush cycle with the tank lid set aside safely and avoid replacing parts unless maintenance approves.
Safety note: The renter-safe version stays inside visual tank checks. Supply lines, fill-valve replacement, wax rings, shutoff valves, and base leaks are maintenance or plumbing work.
What to Measure
Use one flush observation and one five-minute listen test. Do not keep flushing if the bowl or tank behaves abnormally.
| Check | Before | After | Interpretation |
|---|---|---|---|
| Fill time | Flush once | Record seconds until fill stops | Long fill suggests tank-part issue. |
| Cycle recurrence | Quiet after fill | Record minutes until refill sound | Repeated cycling often points to flapper leak. |
| Chain slack | Handle at rest | Record slack: none/some/too much | Caught chains can hold flapper open. |
| Floor check | Dry floor around base | Record dry/wet after test | Floor water stops DIY immediately. |
Symptoms and Stop Points
| Symptom | Possible context | Safe first check | Stop point |
|---|---|---|---|
| Handle jiggle stops it | Chain or flapper not seating | Untangle chain gently | Flapper damaged or still running |
| Water overflows into tube | Float/fill valve issue | Visual note | Maintenance |
| Water around base | Seal or supply leak | Stop and photograph | No tank troubleshooting |
| Valve stiff | Old shutoff | Do not force | Maintenance |
Try It or Report It?
| Situation | Beginner can try | Do not touch | Contact |
|---|---|---|---|
| Chain caught | Free chain gently with lid off | Fill valve replacement | Maintenance if recurring |
| Flapper visibly warped | Photograph | Replacement unless approved | Maintenance |
| Floor water | Stop using if needed and document | Base bolts or supply line | Urgent maintenance |
| Overflow risk | Monitor and report | Force shutoff valve | Maintenance |
Renter-Safe First Steps
- Set lid safely aside.
- Watch one flush cycle.
- Untangle a caught chain gently.
- Listen for recurrence and photograph parts.
Stop Lines
- Stop for floor water.
- Stop if the shutoff valve resists.
- Stop if parts are warped or broken.
- Stop if water reaches overflow.
- Stop before replacing plumbing parts.
Observation Plan
Hypothesis: Watching one full flush cycle will identify whether the issue is chain, flapper, float, or fill-valve related.
Setup: Record fill time, chain position, water height, and recurrence without replacing parts.
Materials
- Towel
- Timer
- Flashlight
- Phone camera
- Gloves
What this comparison can reveal: The useful result to look for when checking running toilet is not just a final number. It is whether one small reversible change produces an observable difference while the other conditions stay the same.
What not to repeat: Do not repeat any check that requires force, chemical mixing, opening building systems, standing on unsafe furniture, bypassing safety equipment, or delaying a maintenance request.
Recommendation: Try only gentle chain or float observation. If running continues, report with the cycle notes.
Maintenance Message
What to Photograph
- A wide photo of the toilet tank, handle, chain, flapper, float, and floor area.
- A close-up of the running toilet.
- Any damage, water path, loose part, warning light, label, or unsafe condition.
- A final photo after temporary safe steps, if you took any.
What to Write Down
- Date and time first noticed.
- What changed compared with normal.
- What safe first checks you performed.
- Whether the issue is getting better, worse, recurring, or affecting another room.
First Message
Hi, I noticed running toilet at toilet tank, handle, chain, flapper, float, and floor area. I took photos, checked only the visible renter-safe items, and stopped before opening or changing building-owned parts. It started around [time/date] and is currently [better/worse/unchanged]. Could maintenance inspect it?
Follow-Up Message
Hi, following up on the running toilet at toilet tank, handle, chain, flapper, float, and floor area. It is now [status], and I have added updated photos from [date/time]. Please let me know the expected maintenance window or whether I should take any temporary step while waiting.
Emergency Wording
The toilet is leaking or may overflow. I have stopped troubleshooting and need urgent maintenance.
Additional FAQ
Is a running toilet urgent?
It wastes water and may signal worn parts. Report it if a simple visual check does not stop it.
Can I buy a flapper?
Ask maintenance first in a rental because they may use approved parts and own the repair.
Should I turn the wall valve?
Only if water is actively leaking and the valve turns easily. Do not force it.
Related Next Steps
- Loose Toilet Seat: A Simple Check Before It Gets Worse - A separate low-risk toilet hardware task.
- Under-Sink Leak Check: What to Look For Before Touching Plumbing - Leak observation principles also apply around toilets.
- When Not to DIY a Home Repair - Know when plumbing stops being beginner work.
What Not to Do
- Do not replace fill valves, supply lines, or shutoff valves as beginner rental DIY.
- Do not put cleaning tablets inside the tank to solve running water.
- Do not force a corroded shutoff valve.
When to Pause and Ask for Help
Call maintenance if the flapper is warped, the fill valve keeps running, water reaches the overflow tube, the shutoff valve leaks, the toilet overflows, or water appears around the base.
FAQ
Can I just jiggle the handle?
That may stop it once, but the chain or flapper usually needs a quick check.
Why does the toilet run every few minutes?
Water may be leaking from the tank into the bowl through a worn or misaligned flapper.
Should I buy a replacement flapper?
Ask maintenance first in a rental. They may need to use approved parts.
Is a running toilet urgent?
It wastes water and can signal worn parts. Report it if it does not stop after simple checks.
Final Checklist
- Tank lid placed safely
- Chain has slack
- Flapper sits flat
- Float moves freely
- No floor water
- Maintenance contacted if running continues
References
Use these official resources as background context. Product manuals, lease rules, local requirements, property maintenance instructions, and qualified professional advice should still come first for your exact home.
- Fix a Leak Week - EPA WaterSense. Use as background for why a running toilet should be documented and reported instead of ignored.
- Residential toilets - EPA WaterSense. Use for toilet-efficiency context; renters should stay with visible tank checks and maintenance reporting.
You May Also Like
More beginner-safe guides that connect to this repair, the same room, or the next safety decision a renter may need.
- Loose Toilet Seat: A Simple Check Before It Gets Worse - Tighten a loose toilet seat safely without cracking the bowl or taking plumbing apart.
- Under-Sink Leak Check: What to Look For Before Touching Plumbing - Check under a kitchen or bathroom sink for early leak signs without taking plumbing apart.
- First Apartment Maintenance Checklist - A realistic monthly checklist for keeping a first apartment safer and easier to manage.
- When Not to DIY a Home Repair - Clear stop signs for repairs that are unsafe, lease-sensitive, or require licensed help.
- Small Water Leak: What to Do While Waiting for Maintenance - Contain a small apartment water leak while waiting for maintenance, document the damage, avoid electrical danger, and know when to escalate.
- Slow Shower Drain: Safe Hair and Soap Buildup Cleanup - Clear hair and soap buildup from a slow shower drain without harsh chemicals or pipe damage.
- Slow Bathroom Sink: Renter-Safe First Checks Before Maintenance - Try safe first steps for a slow bathroom sink before escalating to apartment maintenance.
- Garbage Disposal Smell: Safe Cleaning Without Reaching Inside - Freshen a garbage disposal with safe cleaning steps and clear stop points for jams or leaks.