Sticky Apartment Door: Find the Rub Before You Force It
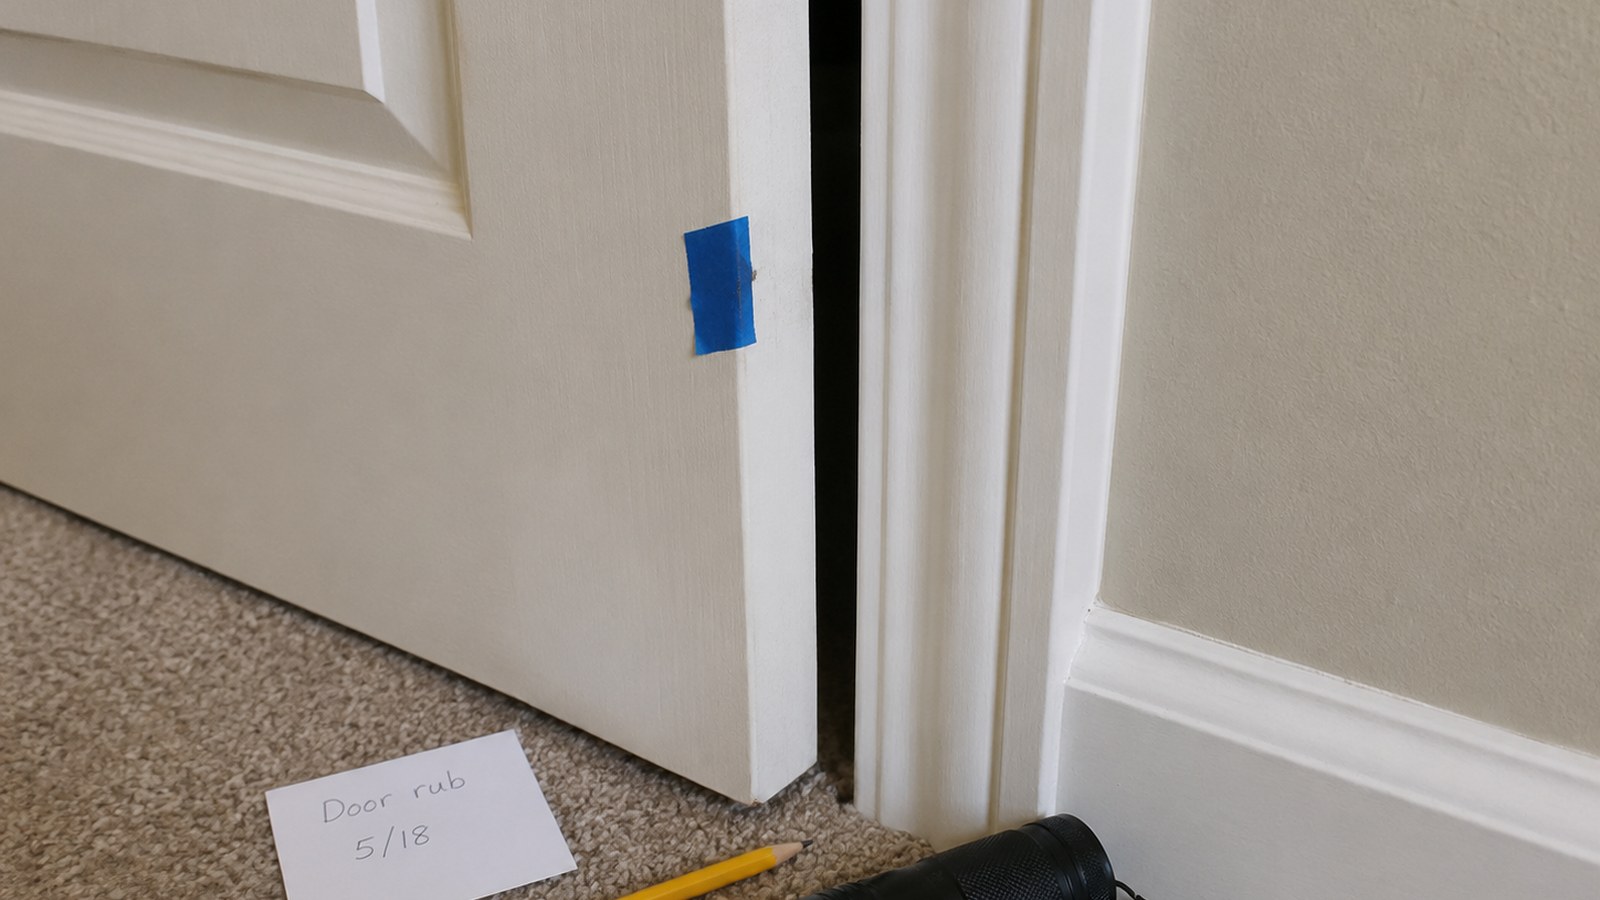
Use this for an interior door that rubs, needs a little extra push, or sticks in humid weather. Do not use it for exterior entry doors that will not lock, damaged frames, or doors that may be warped from water damage.
By Portia Me'uan Thomas. Updated August 17, 2026. Edited for renter-aware safety.
Time: 10-20 minutes. Difficulty: Easy. Safety: Low for interior doors.
Quick Answer
Check where the door rubs, tighten visible hinge screws gently, clean the door edge and frame, and rub a little dry bar soap or candle wax on the sticking contact point. If the door still will not latch or the frame looks shifted, contact maintenance.
Material Fit
Residue removal depends more on the surface below than the sticky material above it.
| Material or surface | Safest first method | Conditional next method | Avoid / stop line |
|---|---|---|---|
| Painted drywall | Warm damp cloth and patient rolling with a finger. | Tiny hidden test before any cleaner. | Stop if paint lifts, texture softens, or color changes. |
| Laminate cabinet or counter | Mild soap, warm cloth, plastic card edge. | Label-safe adhesive remover on a cloth after hidden test. | Avoid flooding seams and strong solvents. |
| Finished wood floor or cabinet | Dry rub first, then barely damp cloth. | Ask before solvents; finishes vary widely. | Stop if finish gets dull, sticky, lighter, or darker. |
| Glass or glazed tile | Warm cloth and mild cleaner. | Razor or scraper only if you know the surface allows it. | Avoid metal tools near frames, caulk, or coated glass. |
Before You Start
- Work with the door open so you do not get stuck inside a room.
- Identify whether the door is rubbing at the top, side, bottom, or latch area.
- Look for new cracks, swelling, water stains, or a loose frame before adjusting anything.
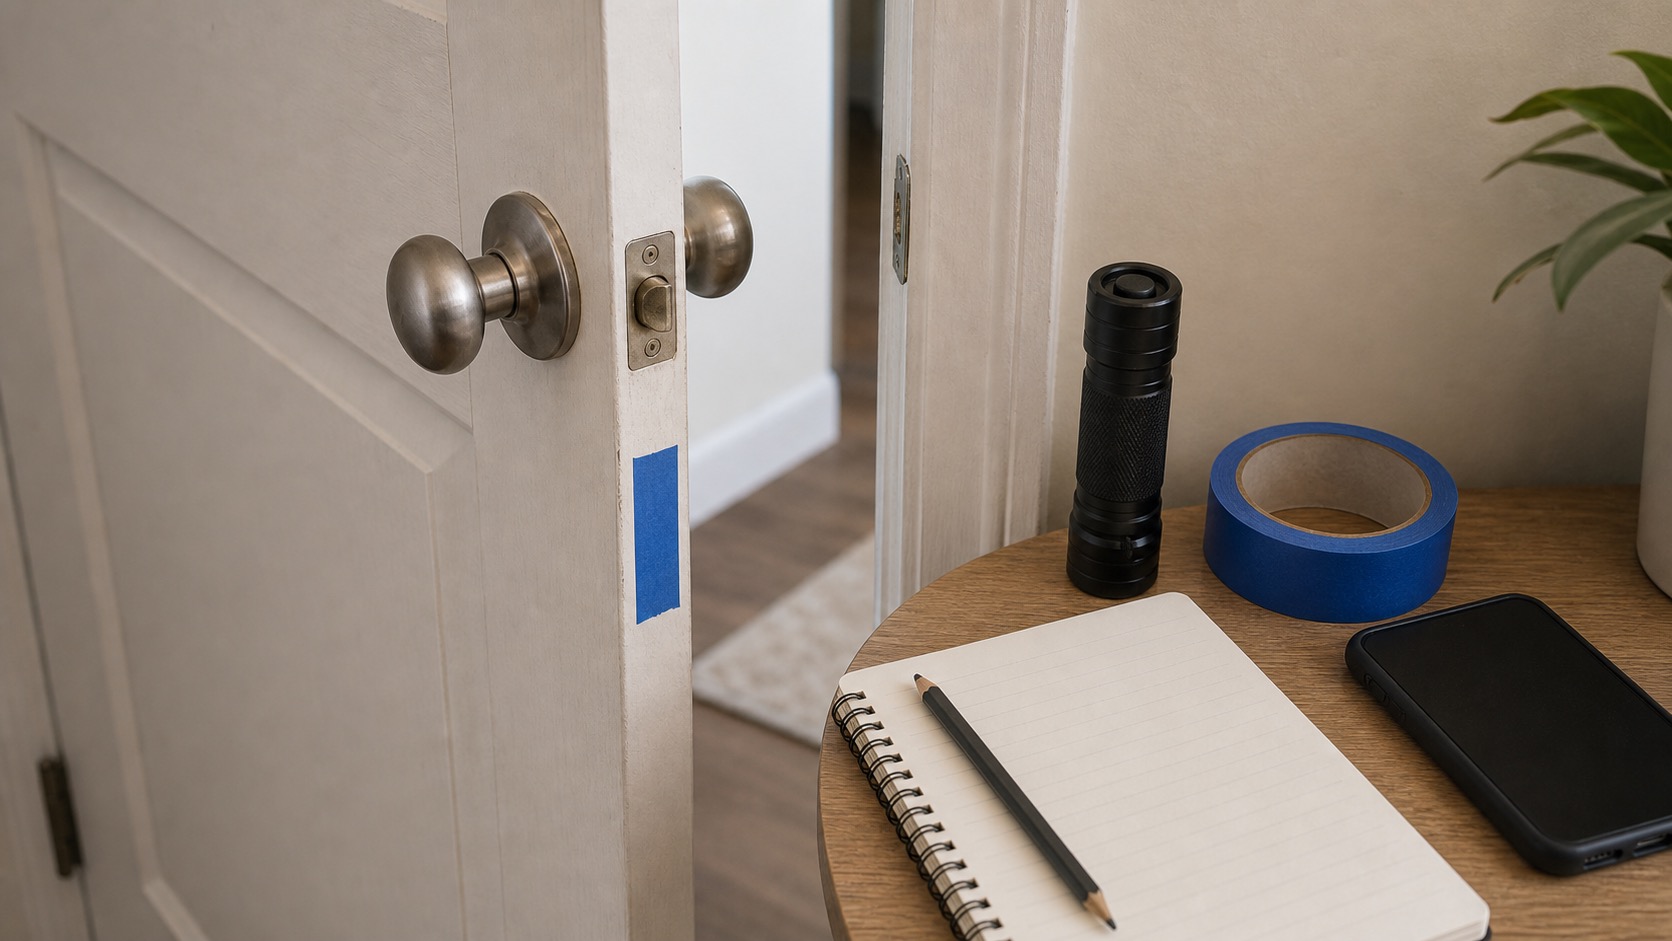
Tools Needed
- Phillips screwdriver
- Flashlight
- Damp cloth
- Dry cloth
- Bar soap or plain candle wax
- Painter's tape
Renter Notes
Do not plane, sand, cut, or drill a rental door without approval. Entry doors and locks are security hardware, so report those problems instead of adjusting them yourself.
Step-by-Step Guide
- Open and close the door slowly while watching where it touches the frame.
What I check before the next step: I keep the door or window from trapping me while testing. Entry locks, broken latches, cracked frames, or security uncertainty belong with maintenance or a locksmith. - Mark the rubbing spot lightly with painter's tape so you do not guess.
What I check before the next step: Before continuing, I confirm the step stayed dry, visible, reversible, and within the lease or my comfort level. - Tighten visible hinge screws a quarter-turn at a time, starting with the top hinge.
What I check before the next step: I keep the door or window from trapping me while testing. Entry locks, broken latches, cracked frames, or security uncertainty belong with maintenance or a locksmith. - Wipe grime or paint dust from the door edge and frame, then dry the area.
What I check before the next step: I keep the door or window from trapping me while testing. Entry locks, broken latches, cracked frames, or security uncertainty belong with maintenance or a locksmith. - Rub a small amount of dry bar soap or candle wax on the contact point.
What I check before the next step: I do not mix chemicals or scrub harder if the finish changes. I ventilate, spot-check, and stop for strong odor, spreading stains, mold growth, or damaged surfaces. - Test the door gently and stop if it still needs force or will not latch securely.
What I check before the next step: I keep the door or window from trapping me while testing. Entry locks, broken latches, cracked frames, or security uncertainty belong with maintenance or a locksmith.
Safe Next Steps
- If the result improved, do one normal-use test and finish with the checklist item: Door kept open while checking.
- If the result is mixed, stop after the listed low-risk checks and decide whether the issue belongs with maintenance, your landlord, or a licensed professional.
- If the result did not improve or got worse, do not add force, stronger chemicals, hidden disassembly, or a new tool. Contact maintenance if any stop sign appears.
- For a rental, send a short maintenance message with where the issue is, when you noticed it, what changed, what safe check you tried, and two photos. Keep the confirmation.
Common Mistakes
- Assuming a sticky door needs sanding before checking hinge screws.
- Using oil on painted door edges, which can stain or attract dust.
- Forcing the door closed and damaging the latch or frame.
Door rub and latch observation
an apartment door that sticks, rubs, or needs extra force is treated here as a beginner observation and control problem first, not a chance to prove you can take apart the home. The safe version is visible, reversible, and easy to stop.
For renters, the important line is ownership. You can usually observe, photograph, time, clean lightly, or tighten a visible non-security part, but hidden systems, building-owned fixtures, and lease-controlled hardware belong to maintenance.
What to Check Before You Act
Record the starting condition, perform only one low-risk check at a time, and compare first contact point, door gaps, hinge and latch, weather pattern. Do not repeat a step that needs more force, chemical, height, access, or disassembly.
| Check | Before | After | Interpretation |
|---|---|---|---|
| First contact point | Record top, latch side, hinge side, or threshold rub | After one safe check: close slowly on a paper strip without forcing | The contact location helps separate debris, swelling, sag, and alignment Stop if the door must be slammed or trapped shut. |
| Door gaps | Record gap width and changes around all four edges | After one safe check: photograph gaps with a simple size reference | Uneven or changing gaps can indicate movement rather than surface friction Stop if the frame is cracked or gaps changed suddenly. |
| Hinge and latch | Record visible loose screws, hinge separation, and latch alignment | After one safe check: gently snug only an approved visible interior screw | A secure hinge with normal latch function supports monitoring Stop if a screw spins, hinge pulls out, or latch misses. |
| Weather pattern | Record humidity, recent leak, paint swelling, and time of day | After one safe check: log when sticking improves or worsens | A pattern supports a clearer maintenance diagnosis Stop if water damage, softness, or rapid worsening appears. |
Common Situations and Stop Points
| Symptom | Possible context | Safe first check | Stop point |
|---|---|---|---|
| First contact point | The contact location helps separate debris, swelling, sag, and alignment | close slowly on a paper strip without forcing | the door must be slammed or trapped shut |
| Door gaps | Uneven or changing gaps can indicate movement rather than surface friction | photograph gaps with a simple size reference | the frame is cracked or gaps changed suddenly |
| Hinge and latch | A secure hinge with normal latch function supports monitoring | gently snug only an approved visible interior screw | a screw spins, hinge pulls out, or latch misses |
| Weather pattern | A pattern supports a clearer maintenance diagnosis | log when sticking improves or worsens | water damage, softness, or rapid worsening appears |
Try It or Report It?
| Situation | Beginner can try | Do not touch | Contact |
|---|---|---|---|
| Observe and document | Keep the door open during checks. Locate the rub with paper and photographs. | Hidden, fixed, energized, pressurized, structural, or lease-controlled parts | Use the record if the baseline is abnormal |
| One reversible first step | Remove loose floor debris and check approved visible screws gently. Log humidity or timing without altering the door. | Anything that needs force, drilling, cutting, panel removal, or mixed chemicals | Maintenance if the first step fails or the condition returns |
| Condition persists | Repeat the observation for first contact point and door gaps, not the repair | Do not escalate tools or improvise a workaround | Landlord, maintenance, manufacturer support, or the responsible professional |
| Warning sign appears | Stop, keep distance, and photograph only if that is safe | Stop if an entry or fire door does not close and latch. Stop for frame cracks, hinge pullout, or sudden gap changes. Stop for swelling tied to a leak or visible moisture. | Urgent maintenance, utility, emergency services, or another appropriate safety channel |
Renter-Safe First Steps
- Keep the door open during checks.
- Locate the rub with paper and photographs.
- Remove loose floor debris and check approved visible screws gently.
- Log humidity or timing without altering the door.
Stop Lines
- Stop if an entry or fire door does not close and latch.
- Stop for frame cracks, hinge pullout, or sudden gap changes.
- Stop for swelling tied to a leak or visible moisture.
- Stop before sanding, planing, drilling, shimming, or moving hardware.
- Stop if the door could trap someone.
Additional FAQ
Can I sand the sticky edge?
Not as a first rental step. Sanding removes material and may hide alignment, moisture, or frame problems.
Why does the door stick only sometimes?
Humidity, temperature, floor debris, hinge movement, or building movement can change the fit. A timing log helps maintenance.
What should I include in a maintenance message?
Include the exact location, when it started, photos, the first contact point and door gaps and hinge and latch and weather pattern, what safe check you performed, and whether the condition improved, stayed the same, or worsened.
Related Next Steps
- Quiet a Squeaky Door Without Pulling Hinge Pins - Separate hinge noise from rubbing and alignment.
- Loose Interior Door Handle: A Safe One-Person Tightening Check - Check whether handle or latch looseness is the real symptom.
- Front Door Security Check for Renters - Use stricter boundaries for an entry door.
What Not to Do
- Do not shave, sand, or cut the door in a rental without written permission.
- Do not adjust an exterior lock or strike plate as beginner DIY.
- Do not ignore sticking that started after a leak, storm, or visible wall movement.
When to Pause and Ask for Help
Contact maintenance if the door is an entry door, will not latch, rubs hard, has loose or stripped hinge screws, shows water swelling, or appears connected to a shifted frame or floor.
FAQ
Why did my door start sticking suddenly?
Humidity, loose hinge screws, paint buildup, settling, or water swelling can all make a door rub.
Can I sand the door edge?
Not unless your landlord approves it. Sanding changes the door permanently and may affect your deposit.
What if the latch sticks instead of the door edge?
Clean around the latch and check for loose handle screws. If the latch does not catch securely, report it.
Is this safe for my front door?
No. Treat front-door sticking as a security issue and contact maintenance or your landlord.
Final Checklist
- Door kept open while checking
- Rub point identified
- Hinge screws gently tightened
- Edges cleaned and dried
- No cutting or sanding done
- Maintenance contacted for security or frame issues
You May Also Like
More beginner-safe guides that connect to this repair, the same room, or the next safety decision a renter may need.
- Loose Interior Door Handle: A Safe One-Person Tightening Check - Tighten a loose interior door handle safely, with renter-aware stop points for locks and entry doors.
- Quiet a Squeaky Door Without Pulling Hinge Pins - Quiet a squeaky apartment door hinge without removing the door or pulling hinge pins.
- Front Door Security Check for Renters - Improve front-door confidence with renter-safe checks, habits, and clear lock repair boundaries.
- When Not to DIY a Home Repair - Clear stop signs for repairs that are unsafe, lease-sensitive, or require licensed help.
- Lost Keys or Locked Out: What to Do First - Handle lost keys or an apartment lockout without damaging the door, lock, or lease relationship.
- Move-In Inspection Before You Unpack - Inspect a rental apartment before unpacking so you can document damage, leaks, locks, and safety issues early.
- First Apartment Maintenance Checklist - A realistic monthly checklist for keeping a first apartment safer and easier to manage.
- Safe to DIY? A Renter's Home Repair Filter - Use a simple safety filter before deciding whether to DIY a repair in your first place.