Loose Interior Door Handle: A Safe One-Person Tightening Check
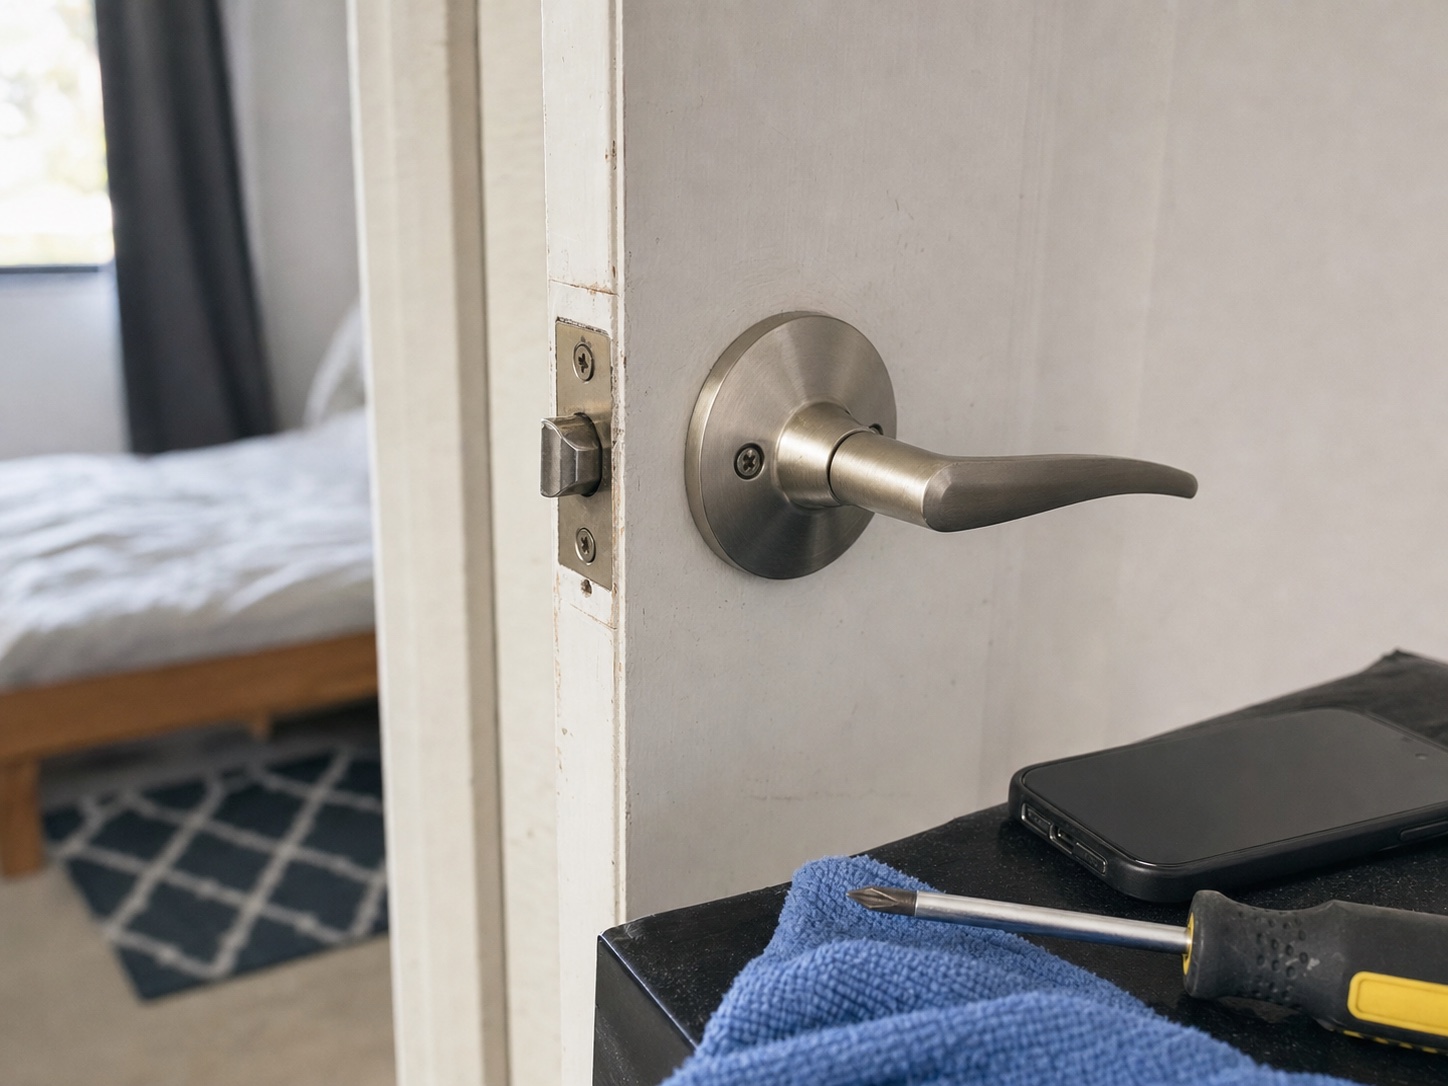
Use this guide when an interior bedroom, bathroom, or closet handle wiggles but the door still opens and closes. It is meant for a loose handle, not a broken exterior lock, damaged door frame, or security problem.
By Portia Me'uan Thomas. Updated June 7, 2026. Edited for renter-aware safety.
Time: 10-15 minutes. Difficulty: Easy. Safety: Low for interior doors.
Quick Answer
Keep the door open, find the visible screws or release the trim cover, tighten the handle screws a quarter-turn at a time, then test the latch before closing the door. If the door is an entry door or the latch will not catch, contact maintenance or a locksmith.
Editorial and Safety Note
In this guide, I keep the work inside dry, visible, reversible checks, clear documentation, and early escalation when a problem touches safety systems, building systems, or uncertainty.
My Field Note
For hardware and setup tasks, I start with movement, not force. I watch what wiggles, what stays still, and whether the door, drawer, seat, shelf, or surface still works normally before I tighten anything.
What I Would Measure
The useful comparison is before-and-after movement: does the screw turn gently, does the latch catch, does the wobble reduce, and does the material stay intact?
Where I Would Stop
I stop if a screw spins, material cracks, the task involves an entry lock, the door no longer secures, or the next step would require drilling, anchors, or changing property-owned hardware.
What I Would Save for Later
- Photo before touching screws or trim
- Which part moved and which part did not
- Whether the item still opens, closes, latches, or bears weight normally
- Any stripped screw, cracked surface, or repeated loosening
Safe Ways to Try
For this kind of door hardware, I would give a beginner more than one safe path only while the work stays visible, hand-powered, and reversible.
Method 1: observe and mark the movement
Best when the part wiggles but still works.
- Take a close photo before touching the screws or alignment.
- Move the part slowly once and notice whether the movement is side-to-side, up-and-down, or coming from one screw.
- Stop here if the part affects entry security, a door latch, a cracked frame, porcelain, or anything load-bearing.
I like this first because it tells me whether I am tightening a loose user-facing part or accidentally chasing a bigger alignment problem.
Avoid: Do not start by tightening every screw you can see; that can hide which part was actually loose.
Stop line: Call maintenance, your landlord, or a locksmith if the handle is on an exterior door, the latch does not engage, screws spin without tightening, the strike plate is damaged, or the door no longer secures.
Method 2: quarter-turn tightening
Best when a visible screw is loose and the surrounding material is solid.
- Use the correct screwdriver size so the tip fills the screw head.
- Tighten a quarter-turn at a time, alternating screws when there is more than one.
- Test the part after each small adjustment instead of trying to make it as tight as possible.
The moment a screw spins without catching, I stop. More torque usually makes the repair worse, not better.
Avoid: Do not drill, glue, force stripped screws, or change rental hardware without approval.
Stop line: Stop if the screw strips, the material cracks, the part still wobbles, or the problem affects a lock, latch, frame, wall anchor, or porcelain.
Method 3: normal-use test
Best after the part feels better but before you call it finished.
- Use the handle, hinge, drawer, shelf, or seat the way you normally would.
- Listen for scraping, clicking, shifting, or new resistance.
- Take an after photo if this was a rental issue you might need to explain later.
I do not call a small hardware fix done until it survives a gentle normal-use test without needing force.
Avoid: Do not keep adjusting if every test changes the problem in a new direction.
Stop line: Stop if the part loosens again right away, no longer lines up, or needs body weight or force to work.
If those do not work
- If the gentle tightening path fails, send maintenance the before photo, after photo, and one sentence: what moves, where it is, and whether the item still works.
- If the item affects entry security, heavy furniture, a toilet, or a door that can trap someone, skip more DIY and escalate.
Failure Case
Failure case: tightening or mounting past the safe point
Skipped step: Skipping the gentle movement check and going straight to force, drilling, or heavier hardware.
What can go wrong: Screws can strip, particleboard can crack, drywall can tear, and a renter-safe issue can become damage or a security problem. Heavy furniture can also become less stable if it is loaded before the fix is confirmed.
Safer recovery
- Stop when resistance changes, a screw spins, or the material cracks.
- Photograph the part and unload weight before testing again.
- Ask maintenance or get written approval before anchors, drilling, entry hardware, tall furniture anchoring, or wall changes.
Material Fit
Hardware and setup tasks depend on what the screw or load is biting into. When the material is unknown, I stop before drilling or anchoring.
| Material or surface | Safest first method | Conditional next method | Avoid / stop line |
|---|---|---|---|
| Solid wood or sturdy cabinet face | Hand-tighten visible screws a quarter-turn at a time. | Use normal-use testing before adding load. | Stop for splitting, spinning screws, or shifting alignment. |
| Particleboard / MDF furniture | Gentle cam-lock or screw adjustment only. | Unload shelves before testing. | Avoid over-tightening; it can crumble the material. |
| Drywall or plaster wall | Use removable or approved methods first. | Anchors only with landlord approval and correct hardware. | Stop if the wall crumbles, flexes, or hides utilities. |
| Tile, brick, metal frame, entry door | Document and request approval or maintenance. | Professional installation may be needed. | Do not drill or modify without written permission. |
Before You Start
- Keep the door open so you cannot lock yourself out.
- Look at both sides of the handle before removing any cover plate.
- Take a photo of the handle before you move parts.
Tools Needed
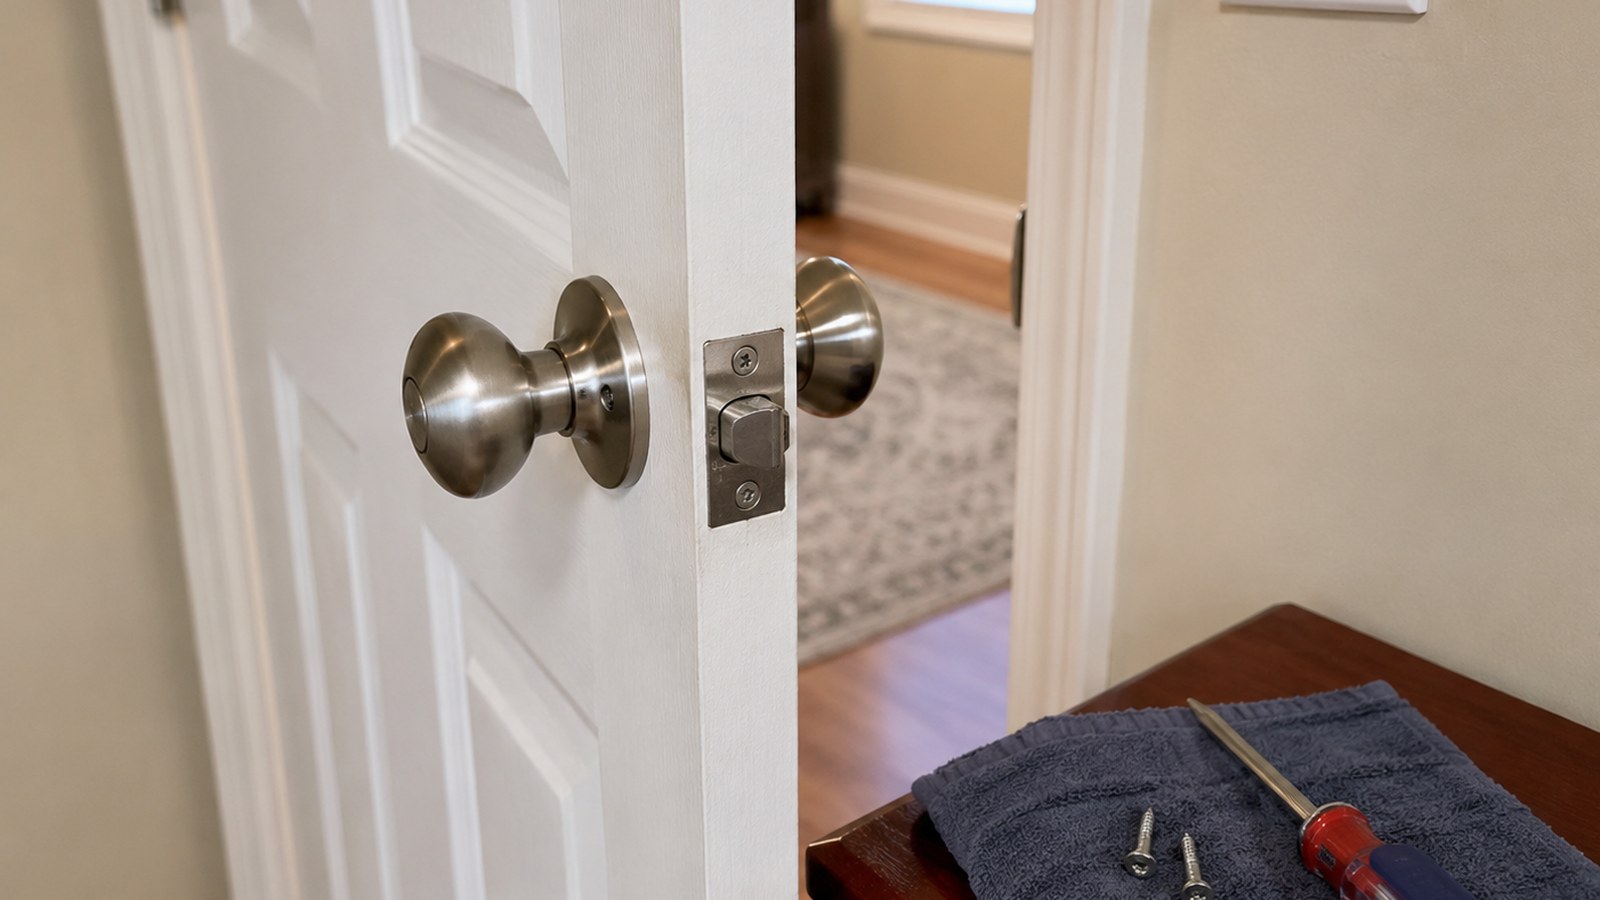
- Phillips screwdriver
- Small flathead screwdriver
- Flashlight
- Small bowl for screws
Renter Notes
For rentals, do not drill new holes, change lock hardware, or modify an entry lock without written permission. Report any entry-door security issue to your landlord or maintenance team.
Step-by-Step Guide
- Look for two screws on the interior side of the knob or lever plate.
What I check before the next step: I use hand pressure only and stop when resistance changes suddenly. Spinning screws, cracking material, wobble, or a need to drill usually means permission or help is needed. - If screws are hidden, find the small slot or pinhole on the trim and gently release the cover.
What I check before the next step: I use hand pressure only and stop when resistance changes suddenly. Spinning screws, cracking material, wobble, or a need to drill usually means permission or help is needed. - Tighten each screw a quarter-turn, switching sides so the handle stays even.
What I check before the next step: I keep the door or window from trapping me while testing. Entry locks, broken latches, cracked frames, or security uncertainty belong with maintenance or a locksmith.
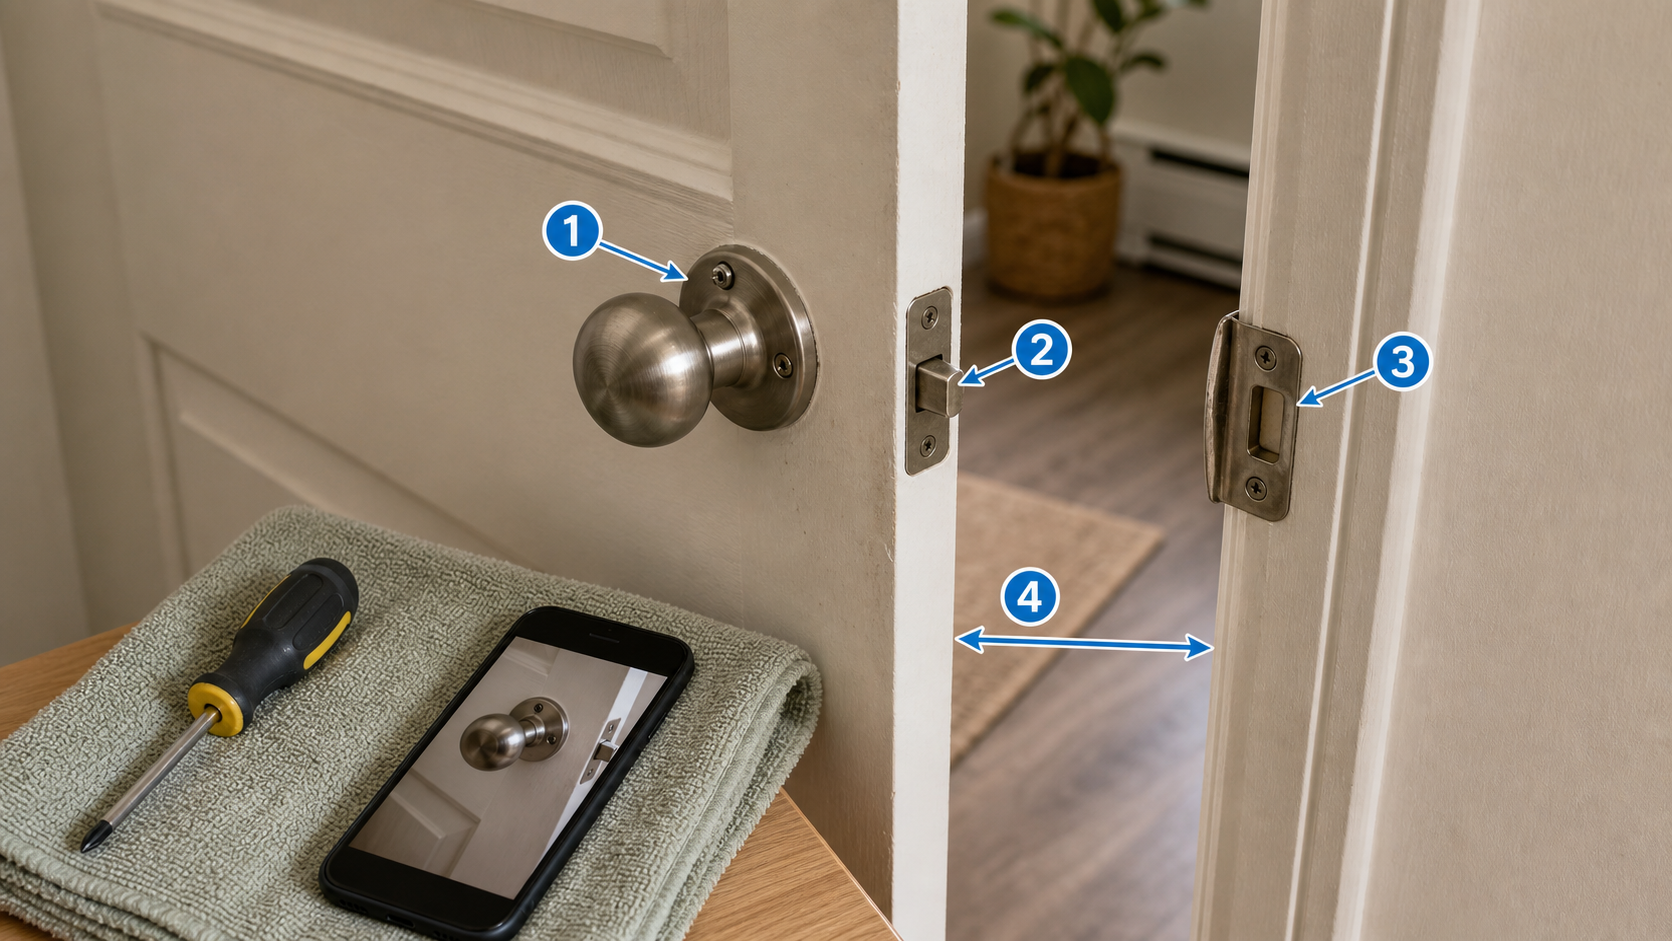
- Turn the handle several times while the door is open and confirm the latch retracts fully.
What I check before the next step: I keep the door or window from trapping me while testing. Entry locks, broken latches, cracked frames, or security uncertainty belong with maintenance or a locksmith. - Close the door slowly and make sure it latches without lifting, slamming, or pushing hard.
What I check before the next step: I keep the door or window from trapping me while testing. Entry locks, broken latches, cracked frames, or security uncertainty belong with maintenance or a locksmith.
Safe Next Steps
- If the result improved, do one normal-use test and finish with the checklist item: Door stayed open while working.
- If the result is mixed, stop after the listed low-risk checks and decide whether the issue belongs with maintenance, your landlord, or a licensed professional.
- If the result did not improve or got worse, do not add force, stronger chemicals, hidden disassembly, or a new tool. Contact maintenance, your landlord, or a locksmith if any stop sign appears.
- For a rental, send a short maintenance message with where the issue is, when you noticed it, what changed, what safe check you tried, and two photos. Keep the confirmation.
Common Mistakes
- Tightening one screw all the way before the other, which can make the handle sit crooked.
- Working with the door closed and accidentally locking yourself out.
- Forcing a stripped screw instead of stopping and reporting worn hardware.
Practical Renter Details
Handle check before you tighten
- Identify whether the handle is on an interior door, entry door, balcony door, or shared-area door before touching screws.
- Take a photo of both sides of the handle so you can put trim covers back in the same position.
- If the latch misses the strike plate, the problem may be door alignment rather than a loose handle.
- If a screw spins without tightening, stop before enlarging the hole or damaging landlord-owned hardware.
What to Document
- Door location
- Whether the latch catches
- Loose screws, stripped screws, or damaged trim
- Whether the door is an entry or security door
Short Maintenance Message
Hi, the handle on [door/location] is loose. I checked only the visible screws while the door stayed open. The latch [does/does not] catch normally. Photos attached. Could maintenance inspect if needed?
What Not to Touch
- Changing lock cylinders
- Drilling new holes
- Working with the door closed
Stop Point
Stop if the door is an entry door, the latch does not secure, screws spin freely, the frame is damaged, or you may get locked out.
Checks, Measurements & Stop Lines
Interior door hardware
loose interior door handle is treated here as a beginner observation and control problem first, not a chance to prove you can take apart the home. The safe version is visible, reversible, and easy to stop.
For renters, the important line is ownership. You can usually observe, photograph, time, clean lightly, or tighten a visible non-security part, but hidden systems, building-owned fixtures, and lease-controlled hardware belong to maintenance.
Benefits
- The reader gets a calm order of operations before panic or embarrassment takes over.
- Measurements make the problem easier to explain to maintenance and easier to compare after each step.
- The guide creates useful evidence without pretending the reader has professional repair responsibility.
Risks
- The visible symptom may be connected to plumbing, electricity, locks, HVAC, or appliance systems that are not beginner-safe.
- A forceful tool, chemical, ladder, or repeated reset can make the original problem worse.
- Rental work done without permission can become a deposit, lease, safety, or insurance issue.
What to Watch For
For this interior door hardware guide, I start by separating what can be observed from what would alter the home. Observation means photos, timing, notes, light cleaning, or checking a visible user-facing part. Alteration means opening a system, forcing a connection, drilling, cutting, bypassing, or hiding the symptom.
The renter-safe part is narrow on purpose: Keep the door open.; Photograph both sides.; Tighten visible screws evenly.. If the real situation does not fit that list, the article should help the reader document and report instead of pushing them into a repair.
The measurement section matters because vague complaints are hard to act on. A drain time, drip rate, indoor temperature, latch test, alarm result, screw movement, or usefulness score gives maintenance a clearer starting point without inventing professional-level certainty.
The field test should stay inside this boundary: Use a looseness scale before and after tightening: visible movement, latch action, and whether the handle returns normally. If a test needs force, chemicals, panels, height, hidden parts, or repeated resets, I would stop the test and turn it into a maintenance message.
The most important stop signs here are: Stop for entry doors.; Stop if the latch does not catch.; Stop if screws spin.; Stop if the door may lock you out.. Once one appears, the next useful action is documentation, landlord or maintenance contact, emergency escalation, or a licensed professional through the proper channel.
The final check is simple: did the condition improve, stay the same, or cross a stop line? I would keep one clear note or photo of that end state so the next action is obvious: keep monitoring, send a maintenance message, or escalate immediately.
Real-World Scenario
The handle wiggles when you close a bedroom or bathroom door, but the latch still catches normally. Because you live alone, the first safety move is to keep the door open so you cannot lock yourself into or out of a room.
Safety note: Interior handle tightening is different from lock repair. Entry locks, deadbolts, cylinders, frames, and strike plates affect security and emergency access, so renters should report them.
What to Measure
Use a looseness scale before and after tightening: visible movement, latch action, and whether the handle returns normally.
| Check | Before | After | Interpretation |
|---|---|---|---|
| Handle wiggle | Record movement in mm or a clear visual note | Record movement after tightening | Shows whether screws were the issue. |
| Latch retraction | Latch fully retracts? yes/no | After tightening: yes/no | Handle should not bind after tightening. |
| Door close test | Closes with normal pressure? yes/no | After: yes/no | Alignment issues are not handle issues. |
| Screw behavior | Screws catch? yes/no | Any spinning? yes/no | Spinning screws are a stop sign. |
Symptoms and Stop Points
| Symptom | Possible context | Safe first check | Stop point |
|---|---|---|---|
| Handle wiggles but latch works | Loose mounting screws | Tighten visible screws evenly | Screw spins |
| Latch misses strike | Door alignment or frame issue | Photograph gap | Maintenance |
| Entry handle loose | Security hardware issue | Document from inside | Do not disassemble |
| No visible screws | Hidden trim plate | Look for notch gently | Do not pry aggressively |
Try It or Report It?
| Situation | Beginner can try | Do not touch | Contact |
|---|---|---|---|
| Interior handle with visible screws | Tighten evenly with door open | New holes or lock cylinder | Maintenance if it loosens again |
| Entry door | Test and photograph | Lock internals | Landlord or approved locksmith |
| Latch failure | Describe whether it catches | Strike drilling | Maintenance |
| Stripped screws | Stop and document | Glue, oversized screws, drilling | Maintenance |
Renter-Safe First Steps
- Keep the door open.
- Photograph both sides.
- Tighten visible screws evenly.
- Test latch before closing.
Stop Lines
- Stop for entry doors.
- Stop if the latch does not catch.
- Stop if screws spin.
- Stop if the door may lock you out.
- Stop before drilling or changing hardware.
Observation Plan
Hypothesis: Quarter-turn tightening on both screws reduces wobble without binding the latch.
Setup: Record handle movement, screw behavior, latch action, and close test before and after tightening.
Materials
- Phillips screwdriver
- Small flathead
- Phone camera
- Flashlight
- Small bowl
What this comparison can reveal: The useful result to look for when checking loose interior door handle is not just a final number. It is whether one small reversible change produces an observable difference while the other conditions stay the same.
What not to repeat: Do not repeat any check that requires force, chemical mixing, opening building systems, standing on unsafe furniture, bypassing safety equipment, or delaying a maintenance request.
Recommendation: Tighten only visible interior hardware and stop if latch or security behavior changes.
Maintenance Message
What to Photograph
- A wide photo of the interior bedroom, bathroom, closet, or hallway door handle.
- A close-up of the loose interior door handle.
- Any damage, water path, loose part, warning light, label, or unsafe condition.
- A final photo after temporary safe steps, if you took any.
What to Write Down
- Date and time first noticed.
- What changed compared with normal.
- What safe first checks you performed.
- Whether the issue is getting better, worse, recurring, or affecting another room.
First Message
Hi, I noticed loose interior door handle at interior bedroom, bathroom, closet, or hallway door handle. I took photos, checked only the visible renter-safe items, and stopped before opening or changing building-owned parts. It started around [time/date] and is currently [better/worse/unchanged]. Could maintenance inspect it?
Follow-Up Message
Hi, following up on the loose interior door handle at interior bedroom, bathroom, closet, or hallway door handle. It is now [status], and I have added updated photos from [date/time]. Please let me know the expected maintenance window or whether I should take any temporary step while waiting.
Emergency Wording
The entry door or lock does not secure. I feel unsafe and need urgent maintenance or approved locksmith help.
Additional FAQ
Can I use glue?
No. Glue can damage rental hardware and make maintenance harder.
What if screws are hidden?
Look for a small trim notch, but stop if the cover resists or you are unsure.
Why did it loosen again?
The screws, door alignment, or lockset may be worn. Report repeat loosening.
Related Next Steps
- Quiet a Squeaky Door Without Pulling Hinge Pins - Another interior door task with clear limits.
- Front Door Security Check for Renters - Entry-door issues have different boundaries.
- Starter Tools for Living Alone: What Actually Earns Space - Choose the right screwdriver before stripping screws.
What Not to Do
- Do not take apart an exterior lock cylinder as beginner DIY.
- Do not drill into a rental door or frame unless your landlord approved it in writing.
- Do not ignore a door that will not latch securely.
When to Pause and Ask for Help
Call maintenance, your landlord, or a locksmith if the handle is on an exterior door, the latch does not engage, screws spin without tightening, the strike plate is damaged, or the door no longer secures.
FAQ
Why does my door handle keep getting loose?
The screws may be stripped, the door may be misaligned, or the lockset may be worn. If tightening lasts only a few days, report it.
Can I use glue or threadlocker?
Avoid adhesives in a rental unless maintenance approves them. They can make future repair harder.
What if I cannot see any screws?
Many handles hide screws under a trim cover. Look for a small notch or pinhole before prying.
Is it safe to fix my front door handle?
Treat front doors as security hardware. Report loose entry handles to the landlord, maintenance team, or locksmith.
Final Checklist
- Door stayed open while working
- Both handle screws snug
- Latch retracts smoothly
- Door closes normally
- Entry-door issues reported
You May Also Like
More beginner-safe guides that connect to this repair, the same room, or the next safety decision a renter may need.
- Quiet a Squeaky Door Without Pulling Hinge Pins - Quiet a squeaky apartment door hinge without removing the door or pulling hinge pins.
- Apartment Showerhead Replacement: The Renter-Safe Version - Find out whether renters can replace an apartment showerhead, how to ask permission, save the original part, and avoid damaging wall plumbing.
- When Not to DIY a Home Repair - Clear stop signs for repairs that are unsafe, lease-sensitive, or require licensed help.
- Front Door Security Check for Renters - Improve front-door confidence with renter-safe checks, habits, and clear lock repair boundaries.
- Lost Keys or Locked Out: What to Do First - Handle lost keys or an apartment lockout without damaging the door, lock, or lease relationship.
- Sticky Apartment Door: Find the Rub Before You Force It - Troubleshoot a sticky interior apartment door with safe, reversible first steps.
- Move-In Inspection Before You Unpack - Inspect a rental apartment before unpacking so you can document damage, leaks, locks, and safety issues early.
- First Apartment Maintenance Checklist - A realistic monthly checklist for keeping a first apartment safer and easier to manage.