Small Drywall Holes in a Rental: Patch or Report?
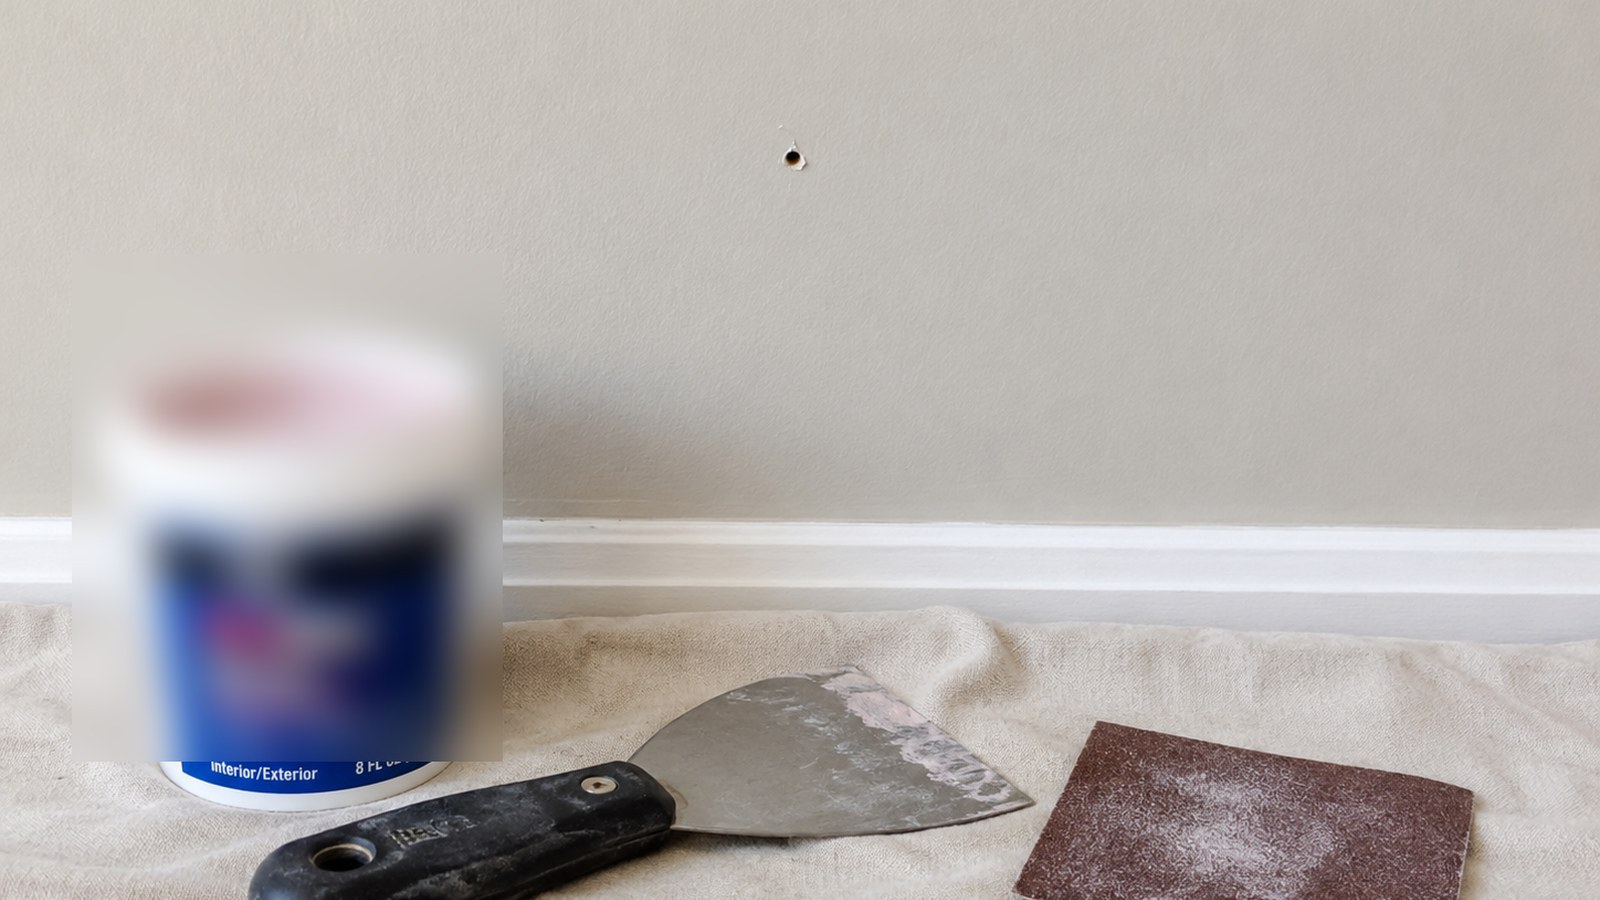
Use this for small nail holes, picture-hanger holes, or tiny screw holes in painted drywall. It is not for large holes, cracked walls, water damage, textured ceilings, or damage you did not cause.
By Portia Me'uan Thomas. Updated August 17, 2026. Edited for renter-aware safety.
Time: 20-30 minutes active work, plus drying time. Difficulty: Easy. Safety: Low for small holes.
Quick Answer
For a small drywall hole, confirm your lease allows minor patching, clean the area, press a tiny amount of lightweight spackle into the hole, smooth it flat, let it dry, sand very lightly, and touch up only if you have the correct paint. Report larger damage or water stains to maintenance.
Material Fit
Hardware and setup tasks depend on what the screw or load is biting into. When the material is unknown, I stop before drilling or anchoring.
| Material or surface | Safest first method | Conditional next method | Avoid / stop line |
|---|---|---|---|
| Solid wood or sturdy cabinet face | Hand-tighten visible screws a quarter-turn at a time. | Use normal-use testing before adding load. | Stop for splitting, spinning screws, or shifting alignment. |
| Particleboard / MDF furniture | Gentle cam-lock or screw adjustment only. | Unload shelves before testing. | Avoid over-tightening; it can crumble the material. |
| Drywall or plaster wall | Use removable or approved methods first. | Anchors only with landlord approval and correct hardware. | Stop if the wall crumbles, flexes, or hides utilities. |
| Tile, brick, metal frame, entry door | Document and request approval or maintenance. | Professional installation may be needed. | Do not drill or modify without written permission. |
Before You Start
- Confirm the hole is smaller than a pencil eraser or ordinary screw head.
- Check for soft drywall, bubbling paint, stains, or dampness; those are not simple patch jobs.
- Take a photo before patching if the damage may matter at move-out.
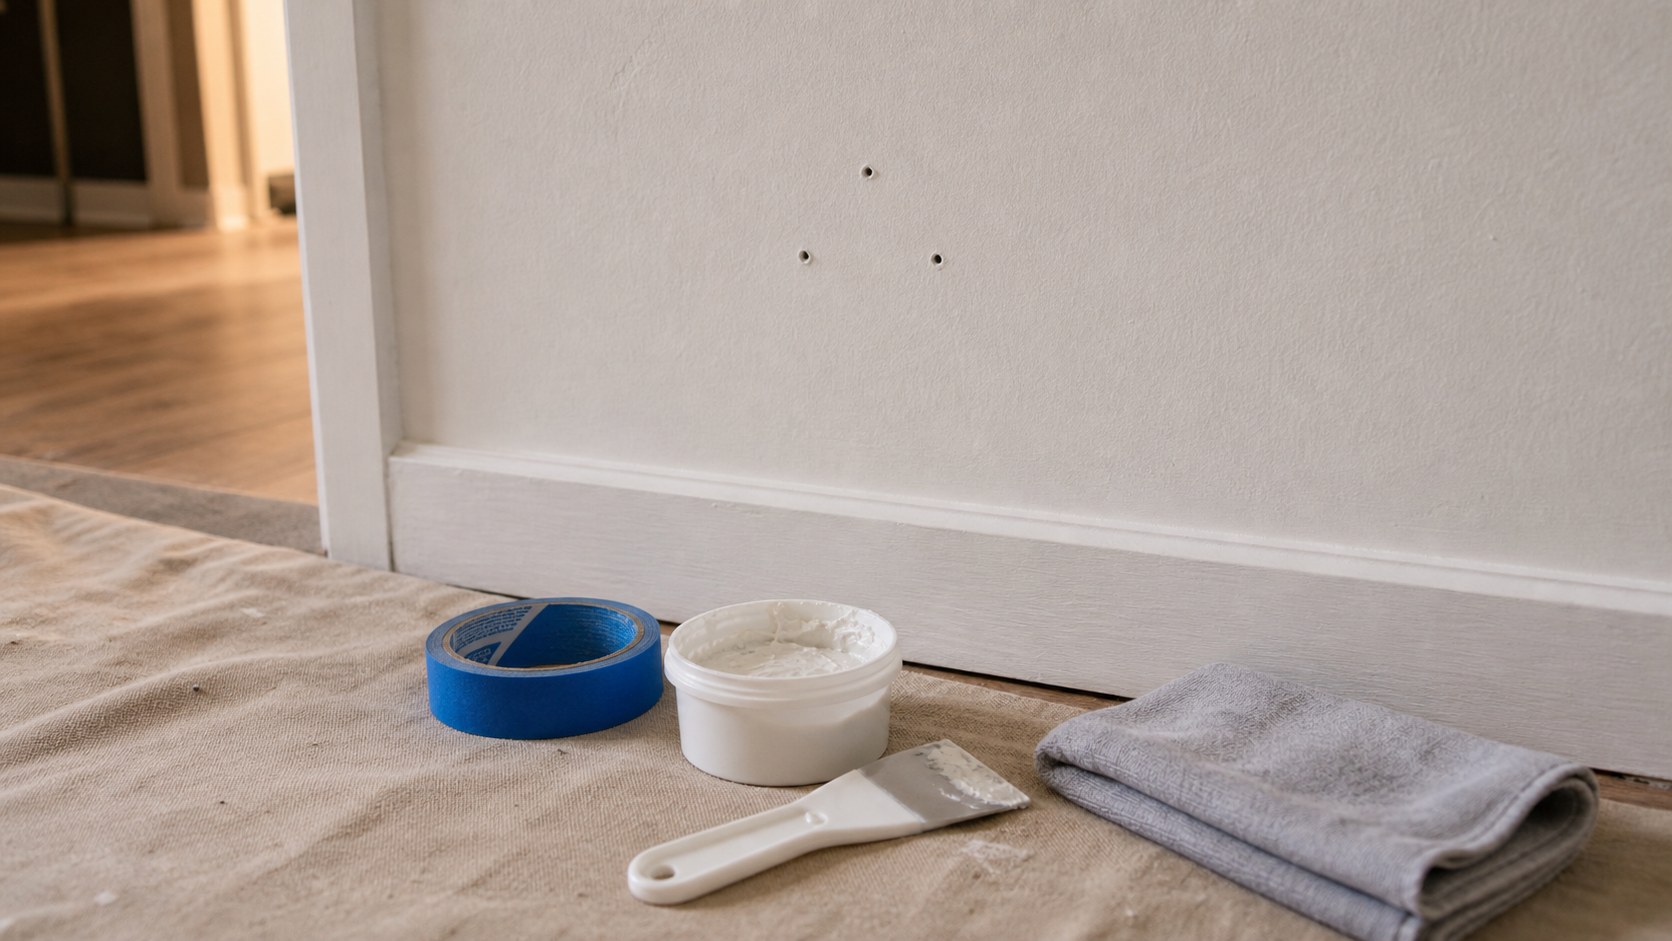
Tools Needed
- Lightweight spackle
- Putty knife or plastic scraper
- Fine-grit sanding sponge
- Damp cloth
- Drop cloth or paper towel
- Matching touch-up paint if approved
Renter Notes
Many landlords prefer to handle wall patches or paint matching themselves. Check your lease before patching, keep the repair small, and avoid painting large areas without written permission.
Step-by-Step Guide
- Wipe dust from the wall around the hole with a barely damp cloth and let it dry.
What I check before the next step: I do not mix chemicals or scrub harder if the finish changes. I ventilate, spot-check, and stop for strong odor, spreading stains, mold growth, or damaged surfaces. - Scoop a small amount of lightweight spackle onto the putty knife.
What I check before the next step: Before continuing, I confirm the step stayed dry, visible, reversible, and within the lease or my comfort level. - Press the spackle into the hole, then scrape across the surface so the patch is nearly flush.
What I check before the next step: Before continuing, I confirm the step stayed dry, visible, reversible, and within the lease or my comfort level. - Let the patch dry according to the product instructions.
What I check before the next step: Before continuing, I confirm the step stayed dry, visible, reversible, and within the lease or my comfort level. - Sand very lightly with a fine-grit sponge until the spot feels smooth, not hollowed out.
What I check before the next step: Before continuing, I confirm the step stayed dry, visible, reversible, and within the lease or my comfort level. - Touch up with matching paint only if you have landlord-approved paint or a verified match.
What I check before the next step: This is where I decide: if the issue is clearly better, I finish with the checklist; if not, I document it and use the stop line instead of improvising.
Safe Next Steps
- If the result improved, do one normal-use test and finish with the checklist item: Lease checked.
- If the result is mixed, stop after the listed low-risk checks and decide whether the issue belongs with maintenance, your landlord, or a licensed professional.
- If the result did not improve or got worse, do not add force, stronger chemicals, hidden disassembly, or a new tool. Contact your landlord or maintenance team if any stop sign appears.
- For a rental, send a short maintenance message with where the issue is, when you noticed it, what changed, what safe check you tried, and two photos. Keep the confirmation.
Common Mistakes
- Using too much spackle and creating a raised patch that is harder to hide.
- Sanding a wide area and dulling the surrounding wall paint.
- Using random white paint that leaves a brighter spot than the original wall.
Small drywall damage assessment
small nail, screw, or anchor holes in rental drywall is treated here as a beginner observation and control problem first, not a chance to prove you can take apart the home. The safe version is visible, reversible, and easy to stop.
For renters, the important line is ownership. You can usually observe, photograph, time, clean lightly, or tighten a visible non-security part, but hidden systems, building-owned fixtures, and lease-controlled hardware belong to maintenance.
What to Check Before You Act
Record the starting condition, perform only one low-risk check at a time, and compare hole size and type, wall condition, finish match, patch profile. Do not repeat a step that needs more force, chemical, height, access, or disassembly.
| Check | Before | After | Interpretation |
|---|---|---|---|
| Hole size and type | Record diameter, depth, count, and whether hardware remains | After one safe check: measure with a ruler and classify nail, screw, or anchor hole | Tiny clean holes are different from anchors, tears, dents, and cracks Stop if an anchor is embedded or the damage is larger than the approved scope. |
| Wall condition | Record dryness, softness, staining, peeling, and crack direction | After one safe check: press only the intact surrounding surface very lightly | Dry firm drywall supports cosmetic work Stop if the wall is damp, soft, crumbling, or actively cracking. |
| Finish match | Record paint color, sheen, and texture in daylight | After one safe check: compare an approved sample in an inconspicuous place | Color and sheen mismatch can make a repair more visible Stop if the correct finish is unknown. |
| Patch profile | Record flatness after the approved filler dries | After one safe check: inspect from the side before any touch-up | A flush patch needs less sanding and paint Stop if repeated filling or aggressive sanding would be needed. |
Common Situations and Stop Points
| Symptom | Possible context | Safe first check | Stop point |
|---|---|---|---|
| Hole size and type | Tiny clean holes are different from anchors, tears, dents, and cracks | measure with a ruler and classify nail, screw, or anchor hole | an anchor is embedded or the damage is larger than the approved scope |
| Wall condition | Dry firm drywall supports cosmetic work | press only the intact surrounding surface very lightly | the wall is damp, soft, crumbling, or actively cracking |
| Finish match | Color and sheen mismatch can make a repair more visible | compare an approved sample in an inconspicuous place | the correct finish is unknown |
| Patch profile | A flush patch needs less sanding and paint | inspect from the side before any touch-up | repeated filling or aggressive sanding would be needed |
Try It or Report It?
| Situation | Beginner can try | Do not touch | Contact |
|---|---|---|---|
| Observe and document | Measure and photograph every hole before touching it. Confirm drywall, paint, and written repair permission. | Hidden, fixed, energized, pressurized, structural, or lease-controlled parts | Use the record if the baseline is abnormal |
| One reversible first step | Use the smallest approved amount of lightweight filler. Let it dry fully and inspect before a minimal touch-up. | Anything that needs force, drilling, cutting, panel removal, or mixed chemicals | Maintenance if the first step fails or the condition returns |
| Condition persists | Repeat the observation for hole size and type and wall condition, not the repair | Do not escalate tools or improvise a workaround | Landlord, maintenance, manufacturer support, or the responsible professional |
| Warning sign appears | Stop, keep distance, and photograph only if that is safe | Stop for anchors, torn paper, dents, cracks, or large holes. Stop for moisture, softness, mold-like growth, or staining. Stop near outlets, switches, plumbing, tile, or unknown wall systems. | Urgent maintenance, utility, emergency services, or another appropriate safety channel |
Renter-Safe First Steps
- Measure and photograph every hole before touching it.
- Confirm drywall, paint, and written repair permission.
- Use the smallest approved amount of lightweight filler.
- Let it dry fully and inspect before a minimal touch-up.
Stop Lines
- Stop for anchors, torn paper, dents, cracks, or large holes.
- Stop for moisture, softness, mold-like growth, or staining.
- Stop near outlets, switches, plumbing, tile, or unknown wall systems.
- Stop if paint color or sheen is not confirmed.
- Stop before aggressive sanding or opening the wall.
Additional FAQ
Should I remove a plastic wall anchor?
Not automatically. Removing it can enlarge the hole; ask the landlord or maintenance team how they want anchors handled.
Why does the patch flash under light?
Filler texture, paint sheen, color, and application method can differ from the wall. Confirm the finish before broad touch-up.
What should I include in a maintenance message?
Include the exact location, when it started, photos, the hole size and type and wall condition and finish match and patch profile, what safe check you performed, and whether the condition improved, stayed the same, or worsened.
Related Next Steps
- Move-In Inspection Before You Unpack - Compare the hole with move-in condition photos.
- Curtains in a Rental: Hang Them Without Wall Damage - Plan future wall attachments within lease rules.
- Safe to DIY? A Renter's Home Repair Filter - Use the wall-material and permission filter.
What Not to Do
- Do not patch wet, stained, soft, moldy, or crumbling drywall.
- Do not repair large holes, damaged corners, or textured walls as beginner rental DIY.
- Do not paint a whole wall without landlord approval.
When to Pause and Ask for Help
Contact your landlord or maintenance team if the hole is larger than a small screw hole, the drywall is soft or damp, there are stains or mold, the wall texture is damaged, or you are unsure whether your lease allows patching.
FAQ
Can I patch nail holes before moving out?
Often yes, but leases vary. Some landlords prefer to handle paint and patching so the finish matches.
Do I need a wall patch kit?
For tiny nail and screw holes, lightweight spackle is usually enough. Mesh patches are for larger damage and are easier to make obvious if you are new.
What if the paint does not match?
Stop after the smooth patch and ask maintenance. A mismatched touch-up can look worse than the original hole.
Can I use toothpaste?
No. It can shrink, discolor, smell, and create problems for proper repair later.
Final Checklist
- Lease checked
- Hole confirmed small and dry
- Spackle kept minimal
- Patch dried fully
- Sanded lightly
- Paint touched up only with an approved match
You May Also Like
More beginner-safe guides that connect to this repair, the same room, or the next safety decision a renter may need.
- Curtains in a Rental: Hang Them Without Wall Damage - Add privacy with renter-friendly curtain options that avoid drilling and wall damage.
- Starter Tools for Living Alone: What Actually Earns Space - Build a compact toolkit for apartment living with renter-safe basics, a buy-first order, and clear limits on tools you do not need yet.
- First Apartment Maintenance Checklist - A realistic monthly checklist for keeping a first apartment safer and easier to manage.
- When Not to DIY a Home Repair - Clear stop signs for repairs that are unsafe, lease-sensitive, or require licensed help.
- The Quiet Habit That Helped at Move-Out: Why I Photograph Apartment Problems Now - Build a simple, privacy-aware apartment photo record with safe wide and detail images, useful notes, original files, official request confirmations, and move-out comparisons.
- Move-In Inspection Before You Unpack - Inspect a rental apartment before unpacking so you can document damage, leaks, locks, and safety issues early.
- Pest Evidence in a Rental: Where to Check First - Look for early pest evidence in a rental apartment and report it before the problem spreads.
- Apartment Laundry Without Damaging Clothes - Use shared apartment laundry machines with fewer mistakes, safer habits, and less clothing damage.